Sunday, January 8, 2012

The Promise Necklace


The Original Promise Necklace
Ever made a promise which you intend to keep for a long time? Be it to yourself or to someone special? 

- A promise to always love and be faithful to a spouse
- A promise of friendship
- A promise to yourself to love and protect your family and loved ones
- A promise to work hard to achieve that academic, career or financial goal
- A promise that you will stay sober or will never pick up another cigarette

The Promise Necklace is a simple beaded necklace to remind you of a promise made. It is special, it is personal, yet a powerful symbol of an unbroken promise.

This Promise Necklace is made with quality glass seed beads and a 1.5-2 inches in length of assorted colored Swarovski beads. It can be worn at all times, and because of its simplicity, it will go well with any attire. 

This necklace is designed to be worn with the Swarovski beads slightly to the left, as a symbol that the promise will always be kept close to your heart. 
I wear mine in blue, which represents the love I have for my son, to remind me of my responsibilities to always care and nurture and protect him. 
Choose a color that speaks to you, one that best represents a promise you have made, and wear it proudly close to your heart.


Interested in The Promise Necklace? Go to my Etsy Shop and choose one that you like!


Check out the latest design for The Promise Ring in The Color Palette Series. 


_________________________________________________________________________________

Wednesday, December 28, 2011

4 Christmas Craft Ideas for Kids

 4 Christmas Craft Ideas for Kids

If you've got little ones around your home, you're probably reluctant to buy expensive or breakable holiday knick knacks. Avoid the trouble by having your kids make the decorations themselves -- it'll keep them busy and save you the headache of sweeping up shards of broken ornaments.
Here are 4 Christmas crafts to get you and your kids started on creatively decking your halls:

Paper Snowflakes

A tried and true tradition, the paper snowflake is a staple in homemade Christmas decor. Just like real-life snowflakes, the paper versions come out individual and unique every time. Grab a pair of scissors, fold a piece of paper into a square or circle, and start cutting! Personalize your design to your heart's content and unfold it to reveal your creation. Spice up this traditional craft by using patterned gift wrap or adding glitter to your finished design.

Countdown Candy Tree
This craft is simple and will entertain your kids from now until Christmas. Print up or hand-draw an outline of a Christmas tree on a piece of green paper, give your kids a pile of craft supplies and pieces of candy and let them go crazy. They can color or decorate the tree as much as they like, including writing the numbers 1-25 in the branches of the tree. Have them tape or glue a piece of wrapped candy next to each number, and the countdown is ready to go! Every day until Christmas, they can remove and eat a piece of candy and anticipate the upcoming holiday.

Homemade Gift Wrap
Keep things looking nice and creative under the tree by making your very own homemade wrapping paper. You can use butcher paper, plain white paper, or construction paper -- or if you really want to go green, opt for old newspaper or recycled brown shopping bags. You can use any art materials you want for this one, from glitter to fingerpaint to stamps. Adding your kids' handprints to the paper can make the gift wrap truly special for grandparents and family friends. Get creative by dipping different objects, such as old buttons, in paint and using them to stamp designs on the paper.

Glittery Yarn Ornaments
These ornaments aren't breakable, but they'll still make your tree sparkle! Instead of opting to buy gold and silver balls for your tree, all you'll need is yarn, glue, glitter and a package of balloons. To start, inflate the balloon to the size of ornament you wish to make. Hang a string across your garage or a room where you won't mind the ornaments hanging to dry, and attach the balloons to the string with clothespins or string. Dip the the yarn in glue and tie one end of it to the knot of the balloon. Wrap the sticky yarn around the balloon to form patterns and swirls. Sprinkle on glitter in whatever color you want, and leave the ornaments to dry over night. In the morning, pop the balloon with a needle or pin and remove your finished ornaments from their hanging place. Attach the ornaments to your Christmas tree with ribbons, or buy a package of metallic hooks at the grocery store.


Friday, December 23, 2011

The Art of Napkin Folding


The Art of Napkin Folding
 
Napkins have been around for centuries. Both the ancient Greeks and Romans used napkins, and no formal dinner party would be complete without providing a napkin for a guest to protect their laps and wipe their hands. 


In Europe, napkins are often referred to as serviettes, but the concept remains the same. Napkins may only be a simple square piece of cloth, but presenting napkins in a decorative and aesthetically pleasing manner has become an art form all on its own. 


Napkin folding can turn a simple square napkin into an elaborate and decorative ornament that will look fantastic positioned next to the cutlery, but napkin folding isn’t easy, which is why so many people opt to use napkin rings.
Similar to origami, napkin folding is particularly challenging due to the softness of the napkin material. However, by starching a napkin, you can fold it into some really lovely and elaborate shapes. Napkin folding is something you can do many hours in advance of a dinner party, while sat on a comfy chair or chaise sectional, but it does take plenty of practice.

 
The Pyramid
Often used by restaurants, the pyramid is perhaps the easiest shape in which to fold a napkin. To fold a napkin into a pyramid, first lay the napkin in front of you and fold it in half diagonally to make a triangle. Fold the two ends of the triangle to the center of the napkin to form a diamond shape. Next, turn the napkin over and fold it in half to form a smaller triangle. Turn the napkin over again and fold along the centerline. The result should be a neat and sturdy pyramid that can support its own weight when stood up.

 
The Bishop’s Hat
Another simple shape that you can fold a napkin into is the bishop’s hat. To create the bishop’s hat, first fold the napkin in half, but this time fold it to form a rectangle, not a triangle. Next, fold one corner down the centerline toward you. Then, turn the napkin over and fold the other end away from you so the napkin resembles a squashed rectangle. Turn the napkin around and fold the bottom half of the napkin away from you so the far edges run on top of each other. The next step is a little tricky, as you need to reach under the napkin and pull out the flap created by the folds on the right so it forms two points. You then need to tuck the left triangle underneath the right triangle. Then, with the points away from you, fold the right triangle into the left one. You should then have a hat shape that can be opened out to be stood up next to a place setting.

 
Diamond Pouch
The diamond pouch is a more complicated folded napkin, but this one creates a handy pocket in which to hold cutlery. To make a pouch, again you need to fold the napkin to form a rectangle and then fold again to form a square. Fold back one of the edges, using only one layer, so the point meets the corner of the square on the opposite side. Fold the next layer in a similar fashion just below the previous one, making sure the edges are even. Repeat this step for the next layer and then turn the napkin over. Fold the edges with all the layers over one another, and tuck one edge into the other to hold it all together. You can then insert silverware into the pouch you’ve created.

 
Napkin Rings
Even if you’ve followed these instructions carefully, chances are you may have not created the perfect pyramid, bishop’s hat or pouch. This is because napkin folding takes time, patience and practice. This is one reason why so many people opt to use napkin rings rather than mess about before a dinner party trying to fold napkins into shapes. Napkin rings come in many different varieties, styles and shapes that without any effort can still present napkins in an elegant and stylish manner. To complement napkin rings, wine glass charms add that little touch of elegance, which can make all the difference to a table setting, ensuring it looks good enough to entertain the fussiest of guests.

Enviro-Friendly Kids' Christmas Crafts


5 Enviro-Friendly Kids' Christmas Crafts for Your Home

At our house, the remains of the Thanksgiving turkey are barely crammed into the fridge before we're taking out the Christmas decor. Nope, patience isn't a strong suit in a home with a 5-year-old and 8-year-old (both boys, not that that makes a difference). My kids LOVE holiday decorating. Luckily, so do I.


BC (Before Children), my husband and I had a more kitschy, shabby-chic Christmas decor style. But we've learned to modify that to include all things bright, colorful and handmade. By cutting down on premade decor and using primarily earth-friendly materials, we're keeping things friendlier to the environment, too. Here are five of my family's favorite ways to deck the halls -- with a whole lot of help from four little hands.


1. Make a “chain link" advent calendar.
This is so easy and looks cute anywhere -- we usually put ours in the kitchen next to our regular calendar, but it also looks terrific on the wall next to the Christmas tree or next to your entryway.


Here's how:
Gather scraps of red and green construction paper or plain paper. Using an approximately 6" high green paper piece, cut out the shape of a Christmas tree; allow the kids to decorate it with glitter, glue, faux gems, etc. Next have them cut 3.5" long strips, all the same width, out of both green and red construction paper; you'll need a total of 24.


Glue one strip into a ring; glue the alternating color around that ring to begin your chain. Continue until all the links are on the chain. Staple the top link to the Christmas tree. Hang.


Tear off one ring each day until Christmas Eve arrives (be sure to put any paper into the recycling bin).


2. Deck the tree in boughs of gorgeous.
Wire ornament hangers can be an absolute travesty, especially around eager little hands (ask us how we know this). They also tend to get lost, making it necessary for manufacturers to mold and bend billions of these each year from resources we need.


Long ago, my family began hanging ornaments by pretty ribbons instead. The ribbons add a special look to the ornaments if you choose contrasting colors, scalloped edges, etc., so these make gorgeous decor for your tree no matter what your child's age and ability.


Here's how:
First, you remove any wire hangers that may still be on your ornaments from last year. Now find scraps of cloth material (for example, from outgrown clothes you won't be decorating) in holiday or other pretty colors and cut off lengths of about 4" each.


Have your children thread one ribbon through each ornament (you help if they have trouble with this part), then knot off the end so you have a circle. Hang on the tree.


Tip: have an ornament hanging party for your little one and her friends. Everyone pitches in with threading and tying the ribbons, then they get to select a place on the tree to hang their handiwork. Serve cocoa, warm apple cider and Christmas cookies and play holiday music to get guests in on the Christmas cheer. 

3. Make a tissue paper wreath.
We love traditional evergreen wreaths, but this soft version is definitely kid-friendly both to make and to have around (no accidental scratches). And the results are cute enough to hang anywhere indoors (this decoration won't hold up to severe winter weather, so choose a real or faux needle wreath for outside the home).


Here's how:
You cut out the shape of a wreath as large as you'd like either from cardboard or, if you're handy and have a jigsaw, from wood. (The latter is more likely to survive multiple years, but it's up to you.)


Sit down with the children and have them crush pieces of green tissue paper into balls. Glue the green paper balls tightly together all over the front of the wreath. For a natural touch, add real dried berries from around your yard or the local greenhouse.


By the way, this idea is also great for other seasons and occasions; just change the types of materials you use while keeping things natural. And remember boys and girls alike love nature and “getting dirty." A girl's 1st birthday barnyard theme, for example, looks great with haylike wreaths around the party area.


4. Take your inspiration from nature.
Kids love nature walks that involve hunting for little “treasures" along the way. Collect some and make great holiday decor for your household.


Here's how: Go on a nature walk with your children and pick up pretty, natural winter foliage along the way. Collect in paper bags. When you get home, sort through your treasures. Use springs, twigs, fallen acorns, etc. to create pretty table centerpeices. Or glue them onto thank-you notes and theme party supplies for your or your child's holiday party this year.


5. Buy and plant a real tree this year. Instead of cutting down your own tree this year or reusing an artificial one, buy a planted evergreen. (Make sure the variety you're buying will grow well in the area you plan to eventually plant.)


Here's how:
Buying from a local nursery is best, as these typically stock items that will thrive in your area. Buy a tree that's well established (at least 2.5' tall). Decorate the tree indoors; be gentle and don't use any materials that may harm the tree. Let your child help you water and care for the tree through the holidays.


After the holidays are over, go on a field trip with your child to a spot where you are allowed to plant; consult your city's forestry region for information. Or plant in your own yard. Make sure to do your research first as far as how deep the tree should be planted, what type of natural fertilizer to include and whether the tree should be in full or partial sun or shade. Plant the tree with your child and visit it next year to see how your earth-friendly investment is growing. It's a great learning experience for your child.


These projects are not only pretty and fun, they teach the entire family about being kind to the earth, reusing materials and finding the beauty in nature. Take advantage of these moments to spend time with your family and to remember what's really important: you, them and the earth you live on.
About the author:
As a mom of three boys, Melanie really knows what it is to get into nature and touch everything (including bugs and, most recently, an anole baby lizard). She, her husband and children love hiking in the mountains near their town. Melanie also enjoys somewhat cleaner pursuits, such as writing, cooking and history. She writes part-time for Themeaparty.com.

Monday, December 19, 2011

5 Christmas Gifts You Can Make Yourself


5 Christmas Gifts You Can Make Yourself


Christmas gifts you can make yourself are often the most fun to give or receive. You don’t have to be a master carpenter or skilled artist to make something beautiful – just let your creativity shine!

Reversible Polar Fleece Blanket
Purchase yardage of two different colors or prints of Polar fleece that coordinate well together. How much yardage depends on the size of blanket you want to make. For example, for a baby blanket, two 40-by 40-inch squares is adequate; for a throw you would need two rectangles of at least 45 by 60 inches.
Place the two pieces on a flat surface, wrong sides together. Trim selvage edges and make the two pieces exactly the same size. Make 2-inch cuts into the fabric approximately every ½ inch on all four sides of the material to create fringe. The smaller the blanket, the daintier the fringe should be; adjust your measurements accordingly. Tie the corresponding pieces of fringe from each layer of fleece together to complete the blanket. Place the knot at the top of the fringe, closest to the blanket edge.

Use this same method to make a scarf or shawl from Polar fleece.

Gift in a Jar
Layer all of the dry ingredients needed to make a batch of soup or favorite baked treat in a quart canning jar. For instance, to make a jar of chocolate cookies, layer all of the specific amounts of the dry ingredients so they look attractive in the jar. Include a complete recipe so the gift recipient will know how to complete the dish.

Buckwheat Husk Pillow
Small pillows filled with buckwheat husks are popular for relieving aches and pains. They can be warmed in the microwave oven for soothing heat or kept in the freezer to be at the ready when a cold treatment is best.  Purchase buckwheat husks at your local health food store, and mix it with a scoop full of dried lavender flowers for an extra soothing touch. Sew two pieces of material together to form a rectangle that’s approximately 5 inches by 12 inches or a large crescent at least 12 inches in diameter. Leave 2- to 3-inch opening in the pillow while sewing up the seams. Use a funnel to fill the pillow with husks and hand-sew the opening closed.

Beeswax Candle
Find sheets of colored beeswax at your craft store. Cut a wick that’s 1 inch longer that the shorter end of the beeswax and place the wick on the edge of the sheet. Gently roll the beeswax over the wick; continue rolling until the entire sheet is rolled up. Experiment with different sizes by cutting the sheets in half or quarters before rolling. Bundle several candles together and tie them with a festive ribbon for giving.

Trendy Beaded Necklace
String a variety of large, chunky beads onto sturdy beading string. Use mismatched beads, but keep a cohesive color scheme to give the necklace a theme. A random mix of large beads will create a trendy, modern necklace almost anyone would like. You don’t even need to use jewelry findings – make the necklace big enough to fit over your head, about 18 inches long, and tie it off with a secure knot.

Ideas to Keep the Kids Entertained

Ideas to keep the kids entertained over the Christmas Holidays


Image Credit

Christmas is fast approaching and teachers and parents across the country are busy planning for the holiday festivities. Whilst teachers can occupy children by integrating seasonal themes into lesson plans, they’ll no doubt be looking forward to handing their pupils back to their respective families at the end of an exhausting term. However, many parents will be looking for some suggestions on what they can do to keep their little ones entertained whilst Santa completes the last-minute preparations.
Time is an important factor to consider when thinking of what to do with the kids. Adults tend to find that that the holidays pass by extremely quickly, however if children are bored then it can feel like forever. For fun indoor and outdoor activities that’ll ensure that your children are occupied, that parents get an opportunity to take a break too, and for quality time together as a family, check out the following suggestions:

Get creative with Christmas
Lay some newspaper down, put on aprons and get the glitter out. Children love to get a bit messy and arts and crafts are a great way to keep their minds occupied with something other than what’s on the box. There’s nothing better than homemade Christmas cards, wrapping paper, decorations and gifts that really capture the spirit of Christmas. Hand cut paper snowflakes, tree hangings and paper chains will provide further entertainment when it comes to decorating too. Not only will your house be transformed into a magical winter wonderland that the kids will love, but other family members will certainly appreciate the time and effort that’s been spent on their personalised greetings too.

Santa’s little helpers
Get into the spirit of the holidays with some non-board-game based themed Christmas games for your kids to play. Why not plant some of the tree decorations around the house and task your little helpers with a bauble hunt? Or you could put a twist on other traditional games, such as pin-the-nose on Rudolph or Christmas musical statues?

Make Christmas magical
If you’ve got a garden or outdoor space, why not embrace the spirit of Christmas, and your children’s excitement by helping them to mark out a landing strip for Santa to park his slay on. A bit of Paper tape and cardboard for a stop sign is all that’ll be required for making, and it’ll be a great opportunity for the kids to get some fresh air.

Walking in a winter wonderland
Why not dress warmly and experience the bright Christmas lights of your local neighbourhood? With darker afternoons it doesn’t have to be late to go out for a walk, get some fresh air and have fun spotting countless Santa’s, reindeer and other winter wonderland gems. You could also combine your walk with a trip to your local Grotto or Christmas market.

Panto time
For some traditional Christmas family entertainment, why not book tickets to see a pantomime? Fun, light-hearted and audience interactive, a trip to the theatre could be a great way to enjoy some quality time with your kids. This seasonal treat is relatively cheap too, as family tickets can usually be purchased with some discount.

Get your skates on
Whether it snows or not, you can still have some great fun outdoors, as many parks and recreational spaces host seasonal outdoor skating areas. If the weather’s more wet than wintery you could always locate your local rink and have a giggle on the ice, or side-lines.

Other Santas are your friends
You’ll not be the only parent who’s pushed for time or in need of a few hours’ time out from excited little ones. Why not arrange to take it in turns to host play dates and reserve some relaxation, or wrapping time. Not only will you manage to get that all important last minute shopping done, but your children will have some extra playtime with their friends.
This guest post has been provided by Legoland Holidays - where you can book a short stay at the brand new Legoland Hotel, opening March 2012.

Monday, December 12, 2011

How To Make an Exceptional Ring

 What You Need to Make an Exceptional Ring

Whether you want to wow the love of your life with a bespoke engagement ring, or set up your own jewellery making business, you are going to need the right tools for the job. But what are they, exactly? Here is a list of the equipment you will need to create such a spectacle, presented in order of what you'll need from start to finish.

Ring clamps


Credit: Mauro Cateb
Ring clamps can be made from a variety of materials ranging from plastic to wood and metal. They are used to hold rings while you work on them. Some clamps have one rounded end for working on eternity rings, and the other end is flat for working on cluster rings.

Pendant drill

Most jewellers would say this this tool is almost indispensable. This flexible cable drill consists of a motor unit, often suspended above the user, connected to a hand-piece by a flexible cable which transmits power down to the hand-piece. This allows the hand-piece to be small and light. Speed is often controlled using a foot pedal.

Grain tools

A grain tool is usually made from carbon steel. It looks like a long three-inch nail which has a concave hole in its point. It is mostly used for pushing claws over stones or rounding off grains which are raised by a half round scorper.

Grain tool holder

This is a small wooden handle with a screw chuck at one end for holding grain tools.

Needle files

credit: noriko.stardust
A needle file is a tool used to design or finish small pieces of material. This small tool has a series of teeth laid out on metal with a small handle, designed according to what kind of finish is required on an object. The file is used to smooth and shape metal, wood or glass and is often invaluable when creating intricate details onto an object. The friction created when the teeth of the needle file push against an object effectively shaves off pieces of the material until the effect that is required is produced.

Drills (assorted sizes)

These can be called burs (American) or fraizers (English). They are used for drilling out holes in metal and come in all shapes and sizes ranging from 0.5mm – 10mm. They are made of carbon steel and are used with the pendant drill.

Scorpers (many sizes and types)

The scorper is a tool, like a chisel, used by goldsmiths, silversmiths and jewellers for stone setting, carving shapes, cleaning castings and texturing surfaces as well as engraving.

Loupe

credit: Steven Brownlee
A loupe shows the jeweller or craftsman what the naked eye can’t: it magnifies an object, normally a diamond, ten times over. It is used to inspect the stone and is easy to use. A loupe normally has one or three lenses and allows the user to see the minute details of a stone. They can be mounted on stands or hand-held objects.

Pliers

Long nosed pliers are normally used by setters for straightening or moving claws.

Side cutters

These very sharp cutters are used for cutting down claws or wires.

Buff sticks

Buff sticks are used to polish jewellery, particularly in areas that are hard to polish by hand alone. They are usually flat and made from wood and felt or leather.

Setters buff sticks

These are made from a flat piece of wood about 12 inches long and are wrapped in sandpaper. They are used to take scratches out of the metal and come in different grades ranging from very course to very fine.

This guide was produced by Ingle & Rhode - London based jewellers of unique engagement rings, wedding rings and a variety of other bespoke jewellery designs.

Friday, December 9, 2011

What Jewellery to Wear on Your Wedding

What Jewellery to Wear on Your Wedding Day

When planning what to wear on your wedding day, don't forget your jewellery. With everything else planned so meticulously, it would be a shame to leave your jewellery to a last minute rush.

Your wedding gown is without doubt the most important item of clothing and everything else, including your jewellery, should be chosen to complement your dress. There are many tips to keep in mind when choosing your jewellery but there is one golden (or silver, if you prefer!) rule - keep it simple. Your jewellery should be tasteful and understated, allowing you and your dress to be the stars of the day.

You will probably know by now whether you prefer to wear gold or silver fashion jewellery but bear in mind that the colour of your wedding dress could influence your wedding day jewellery choice. A bright white wedding gown would look totally wrong with clashing gold jewellery so the advice is to stick to pearl, silver or platinum.

Slightly off-white or diamond-white dresses allow a little more freedom. Pearl, gold and silver fashion jewellery all complements the off-white colour. Gold jewellery is perfect for ivory wedding gowns, bringing out the soft, creamy hints in the gown's fabric.

If you want a little more colour in your gold or silver fashion jewellery avoid picking out any colour decoration on your dress, as it may look a little too twee. You could choose some jewellery with colours matching the flowers in your bouquet or you could choose to include your birthstone in your jewellery.

The next step towards choosing your wedding day jewellery is to consider your dress's neckline. Not all necklines suit a necklace whereas others cry out for a particular necklace style. If your dress has a V-neck, a necklace will complete the outfit. A simple pendant on a fine chain will look beautifully elegant or opt for classic style with a pearl choker. A v-neck allows for a small amount of daring with gold or silver fashion jewellery, particularly if the dress has a vintage look. Try pairing the dress with a modern style, matching choker and earrings for a stylish contrast or go for the full vintage look with jewellery inspired by what your Mum or Gran would have worn on their wedding day.

Avoid a necklace if your dress has a halter neck and choose a pretty bracelet or earrings instead. Strapless or sweetheart necklines allow you the choice of wearing an elegant pendant or choker or leaving your décolletage bare and opting for some statement earrings instead, particularly if you are planning to wear your hair up. Chandelier earrings always look great with upswept hair.

If you are struggling to choose the right wedding day jewellery, here are two further tips. Firstly, you can't go wrong with the classic combination of a diamond pendant or strand of pearls teamed with a pair of diamond drop earrings. Secondly, it's your special day and you have to be comfortable in what you're wearing. If it doesn't feel right, don't wear it and choose a piece of gold or silver fashion jewellery that you feel reflects your personality. You have got to be dazzling as well as your jewellery!

Hi guys, I am Rob Elliot a serial blogger who enjoys writing content on a number of topics. I hope to contribute a lot of value to blogs and that readers will find my posts interesting, useful or even exciting (I will see what I can do). I am currently working on behalf of www.pearlandbutler.com who are experts in costume jewellery

Thursday, March 3, 2011

Ruby - Beaded Napkin Ring

Ruby Napkin Ring


This napkin ring with it's 16mm ruby red glass bead as focal piece would make a beautiful addition to your table. They are truly elegant and classy and they are the perfect choice for a formal setting. They also make a great gift for a wedding.


Monday, February 14, 2011

A Newfound Interest


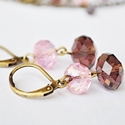
Jewelry, Stitch Markers And Bookmarks

Time seemed to have passed very quickly for me since Christmas. Many things have happened, and I have been extremely busy with my little kid going to school again after the long break in December, birthday parties, the Lunar New Year celebrated just last week, and.. my love for a newfound hobby, crafting!

I have taken some time off from making napkin rings, and for that I apologize. I know from GA that there are hundreds who come to this blog everyday in search for napkin rings, I am thankful for all the views and orders that I have received, but I am sorry that there hasn't been anything new for quite some time. I will start making some again soon. But for now, I'd like to introduce to you my latest hobby, and that is playing with beads! Or rather, creating more items with them. 

With all the beads that Ive collected during the last year or so since I started making napkin rings and wine glass charms, I've decided to turn them into other useful items. So one day, I sat myself down, armed with my pliers and cutter, some headpins and jump rings, wires and clasps, I started making.. jewelry!

I have to admit they aren't that great, but I sure had a lot of fun making them. And with a few lessons that I took later, I managed to learn a thing or two about jewelry making. It has been fun and I think I might do this a little longer :)

Anyway, apart from jewelry, Ive also made some cute stitch markers and bookmarks. Since I have all the beads why not make full use of them? Ive also started paying more attention to my Etsy shop. For those who arent familiar with it, Etsy is an e-commerce website which focuses mainly on handmade, vintage items as well as art and craft supplies. Let's see where that takes me. But as for now, Im just really having a great time crafting! Maybe I'll have a tutorial soon on jewelry making!


Have a look at my Etsy shop: 


About me

Total Pageviews

Followers

Copyright © 2009-2011 Community is Designed by Bie Converted To Community Galleria by Cool Tricks N Tips

Privacy Policy|Napkin Rings