I love cloth napkins almost as much as I love napkin rings! In fact I love them so much that when it comes to using them at a dinner or luncheon at home, I end up hiding them away and use paper napkins instead! However, there are some things that cloth napkins can do that its paper counterpart can't. And one of them is a well presented, beautiful fold at the center of your plate. Besides, on a formal dining, it is usually best to use cloth napkins than paper ones.
Cloth napkins, just like paper napkins, come in various sizes. And they come in all sorts of colors, prints, and some are even monogrammed.
Napkins can play a very important role in an elegantly set dining table. Roll them, fold them, slide in a cute ring or tie a ribbon around them. There are so many things that you can do, some like to impress their guests with a more elaborated display such as the peacock or swan folds, while others may opt for a more simple, traditional fold, or with nothing but a ring through a rolled-up napkin. I personally prefer simple elegance, nothing too flashy and yet pretty enough to make a statement, and to lighten up the dining table. Here I'll share with you some of my favorite ways of how to fold napkins.
- Napkin Ring Roll
- Knot
- Cone
- Surprise Package
- Ascot
- Offset
- Fan-dango
- Fan
- Butterfly
1. Ring Roll
Being someone who designs and create napkin rings as a hobby, this fold (or roll) is naturally my very favorite as it is the best way to show off my creations.
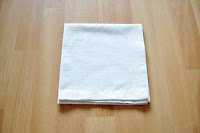
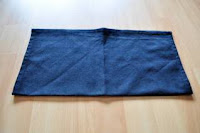
(a) Fold a large square napkin into quarters.
(b) With the loose edges at the bottom, start rolling the napkin from bottom up (this way your rolled-up napkin will not show the loose edges)
(c) Secure your rolled-up napkin with a ring.
2. Knot
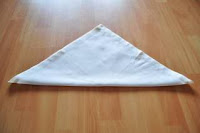
(a) Fold a large napkin into half diagonally.
(b) Start rolling the napkin starting from the folded corners.
(c) Tie a knot at the center of the rolled-up napkin.
3. Cone
(a) Fold a napkin into quarters.
(b) With the loose corners on top, bring down the first layer to almost half way down.
(c) Repeat with second layer leaving about 1 inch between the two points.
(d) Turn the napkin over. Fold in the sides.
(e) Turn in over once again. Slide in cutleries into the pocket if you wish or leave it as it is. You may also choose to leave a little 'something' on the napkin as deco. I like to leave a wine glass marker so that my guests can have a little bit of fun putting it on their own glasses). 4. Pocket
(a) Fold a napkin into quarters.
(b) With the loose corners on top, fold down the top layer so that it meets the point at the bottom.
(c) Turn it over. With the two tips from earlier positioned at the bottom-right corner, fold in the left side first then the right . You may choose to secure the right folded side into the tiny "triangle pocket" you see on the left.
(d) Turn it over and slide in your cutleries.
(a) Fold a napkin into quarters.
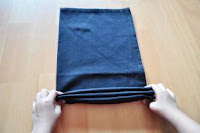
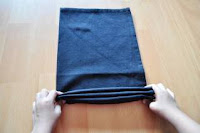
(b) With the loose corners on top, fold the napkin from left to right (or right to left) into accordion pleats.
(c) Slide a napkin ring to the center of the napkin and bunch it out at the top and bottom.
6. Ascot
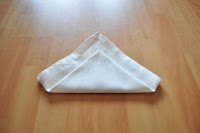
(a) Fold a napkin into quarters. Make sure that the points of the loose corners are aligned well, iron if you have to.
(b) With the loose corners at the bottom, fold down the top corner.
(c) Turn the napkin over. Fold in the left and right corner at an angle, i.e. the top edge of left and right side must be lower than the center.
(d) Turn it over. If you are happy with the way it turns out, press down to crease the edges. This is a the perfect fold to show off your monogrammed napkins.
7. Simple Bouquet
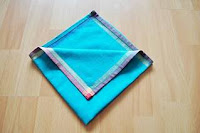
(a) Fold a large napkin as shown in picture. Make sure that the 4 'triangles' you see at the top are equal in size.
(b) Pinch the 'middle point' of the napkin and slide in a ring to the center of the napkin.
8. Fan-dango
(a) Fold a napkin into half.
(b) Make an accordion pleat along the narrow length of the napkin.
(c) Slide a napkin ring to the center of the napkin, or alternatively, you can tie a ribbon at the middle. Fan out the sides.
9. Fan
(a) Fold a napkin into half.
(b) Make an accordion pleat along the narrow length of the napkin.
(c) Instead of sliding a napkin ring to the center (or tying a ribbon here), leave the ring (or ribbon) at the edge of one side.
There are various ways to display the fan fold. Here are some ideas.
10. Butterfly
(a) Fold a large napkin into half, diagonally.
(b) With the folded side at the bottom, fold in the right and left sides so the meet in the center. Make sure all the tips/points are aligned together.
(c) Fold the bottom point up to within an 1 - 1.5 inch of the top point.
(d) Then fold the tip down so that it touches the lower edge of the napkin.
(e) Turn it over. Fold in the left and right side of the napkin. Secure one corner into the little triangle pocket of the other.
(f) Turn it over again. Open the bottom side of the napkin so that it can stand up-right.
(g) Pull down the left and right 'wings'.
That is all for now. I hope you've enjoyed the tutorial on napkin folding and that it has given some ideas for this festive season!


















7 comments:
You know that is just precious. I love your do-it-yourself tutorial article. The presentation is very informative with pictures in the follow through.
Thank you so much Stella!
These are some great folding techniques! Thank you so much for posting these. I will be using one of them for my next party for sure.
Had no idea cloth napkins could be presented in such wonderful ways. Thank you for sharing this.
Thank you for this tutorial! I just shared with fans from my shop, Eljah*B. www.eljahb.etsy.com
Become a fan as well by clicking "like" at the top of my shop.
Blessings!
All the fold is good for HM student thanks for sharing.
tnx for this tutorial ..
thumbs up for you guyz ...
:-)
Post a Comment