Showing posts with label Tutorial. Show all posts

Friday, October 5, 2012

How to make stitch and crochet markers

Crochet Stitch Markers

Tutorial: How to make crochet stitch markers


It seems like my recent post about stitch markers have generated quite a bit of views, I guess I’m not the only one that finds them adorable. In case you don't know which post I’m referring to, go here: http://charmingbeadz.blogspot.com/2012/10/stitch-markers-what-they-are-how-to-use.html.

So since so many are interested in stitch markers I have decided to make a tutorial on how to make them, cause I know readers just simply love tutorials! They are really fun to make cause you don't need a lot of materials, and they are super easy to make too!
Here are the things that you will need to make a simple beaded stitch marker (the one that we are making today will be an open marker which means they are perfect for crocheting):

·        Beads
·        Headpin
·        Lobster clasp
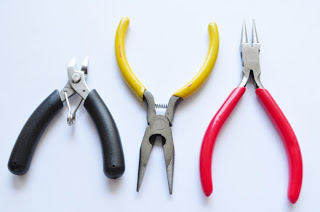
·        Round nose pliers
·        Chain nose pliers
·        Cutter

Materials needed to make stich markers

Tools needed to use to make stitch markers


1. Slide your bead/beads through a headpin.  Here I’m using 2 pearls and some spacers.


step nr 1.

2. Holding the bead firmly in one hand, use the other hand to bend the headpin 90 degree downward, just above the last bed. Push your nail at spot where you will be making the bend with the hand holding the bead so that you get a neat bend.


2

3. Leave about 7-8mm of the pin and use your cutter to cut away the rest. The length of the headpin will determine the size of your loop. If you want a smaller/bigger loop, the length of the pin should be adjusted accordingly. 7-8mm should give you a medium size loop, the way I like it.


3

4: Time to make a loop.
Take your round nose pliers and grip the tip of the wire firmly, leaving just a tiny little bit of wire peeking through the barrels of your pliers. 


4

5. Now rotate your wrist to twist the wire into a semi-loop.


6. Release the wire and rotate your wrist back to its start position, grip the wire one more time and rotate again till you get a complete loop.
(If you are having trouble with this, you can check out the many video tutorials available on Youtube, just search for Jewelry Making Simple Loop, you should find all the help you need).


5

7. Now we will need to open the loop to insert the lobster clasp. To do this, firmly hold the neck of the loop with your round-nose pliers.  


8. Using your chain-nose pliers, grip the tail of the wire where the opening. With both hands gripping on the pliers firmly, gently twist one pliers up and the other down. Now there will be an opening in the loop.
(Again, if you struggle with this step, those Youtube videos should be able to help)


9. Insert the lobster clasp through the loop.


7


10. Using the same method above, close the loop.


8

So there you go! Easy peasy steps to making your own stitch marker and/or crochet markers.
 
Stitch marker - final product

If you do not wish to use lobster clasp and prefer to have a set of closed markers, you can use any suitable sized ring-type findings you can find at your craft store instead. 

Have fun crafting!


Selina

Monday, December 12, 2011

How To Make an Exceptional Ring

 What You Need to Make an Exceptional Ring

Whether you want to wow the love of your life with a bespoke engagement ring, or set up your own jewellery making business, you are going to need the right tools for the job. But what are they, exactly? Here is a list of the equipment you will need to create such a spectacle, presented in order of what you'll need from start to finish.

Ring clamps


Credit: Mauro Cateb
Ring clamps can be made from a variety of materials ranging from plastic to wood and metal. They are used to hold rings while you work on them. Some clamps have one rounded end for working on eternity rings, and the other end is flat for working on cluster rings.

Pendant drill

Most jewellers would say this this tool is almost indispensable. This flexible cable drill consists of a motor unit, often suspended above the user, connected to a hand-piece by a flexible cable which transmits power down to the hand-piece. This allows the hand-piece to be small and light. Speed is often controlled using a foot pedal.

Grain tools

A grain tool is usually made from carbon steel. It looks like a long three-inch nail which has a concave hole in its point. It is mostly used for pushing claws over stones or rounding off grains which are raised by a half round scorper.

Grain tool holder

This is a small wooden handle with a screw chuck at one end for holding grain tools.

Needle files

credit: noriko.stardust
A needle file is a tool used to design or finish small pieces of material. This small tool has a series of teeth laid out on metal with a small handle, designed according to what kind of finish is required on an object. The file is used to smooth and shape metal, wood or glass and is often invaluable when creating intricate details onto an object. The friction created when the teeth of the needle file push against an object effectively shaves off pieces of the material until the effect that is required is produced.

Drills (assorted sizes)

These can be called burs (American) or fraizers (English). They are used for drilling out holes in metal and come in all shapes and sizes ranging from 0.5mm – 10mm. They are made of carbon steel and are used with the pendant drill.

Scorpers (many sizes and types)

The scorper is a tool, like a chisel, used by goldsmiths, silversmiths and jewellers for stone setting, carving shapes, cleaning castings and texturing surfaces as well as engraving.

Loupe

credit: Steven Brownlee
A loupe shows the jeweller or craftsman what the naked eye can’t: it magnifies an object, normally a diamond, ten times over. It is used to inspect the stone and is easy to use. A loupe normally has one or three lenses and allows the user to see the minute details of a stone. They can be mounted on stands or hand-held objects.

Pliers

Long nosed pliers are normally used by setters for straightening or moving claws.

Side cutters

These very sharp cutters are used for cutting down claws or wires.

Buff sticks

Buff sticks are used to polish jewellery, particularly in areas that are hard to polish by hand alone. They are usually flat and made from wood and felt or leather.

Setters buff sticks

These are made from a flat piece of wood about 12 inches long and are wrapped in sandpaper. They are used to take scratches out of the metal and come in different grades ranging from very course to very fine.

This guide was produced by Ingle & Rhode - London based jewellers of unique engagement rings, wedding rings and a variety of other bespoke jewellery designs.

Friday, October 15, 2010

Napkin Folding

Napkin Folding Image

10 Ways to Fold a Napkin

I love cloth napkins almost as much as I love napkin rings! In fact I love them so much that when it comes to using them at a dinner or luncheon at home, I end up hiding them away and use paper napkins instead! However, there are some things that cloth napkins can do that its paper counterpart can't. And one of them is a well presented, beautiful fold at the center of your plate. Besides, on a formal dining, it is usually best to use cloth napkins than paper ones.

Cloth napkins, just like paper napkins, come in various sizes. And they come in all sorts of colors, prints, and some are even monogrammed. 

Napkins can play a very important role in an elegantly set dining table. Roll them, fold them, slide in a cute ring or tie a ribbon around them. There are so many things that you can do, some like to impress their guests with a more elaborated display such as the peacock or swan folds, while others may opt for a more simple, traditional fold, or with nothing but a ring through a rolled-up napkin. I personally prefer simple elegance, nothing too flashy and yet pretty enough to make a statement, and to lighten up the dining table. Here I'll share with you some of my favorite ways of how to fold napkins.


  1. Napkin Ring Roll
  2. Knot
  3. Cone
  4. Pocket
  5. Surprise Package
  6. Ascot
  7. Offset
  8. Fan-dango
  9. Fan
  10. Butterfly


1. Ring Roll


Being someone who designs and create napkin rings as a hobby, this fold (or roll) is naturally my very favorite as it is the best way to show off my creations. 
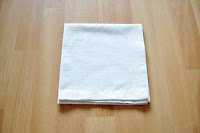
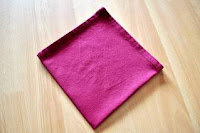
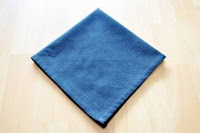
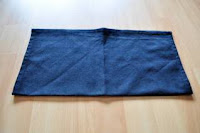
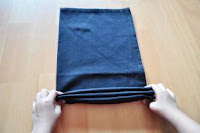
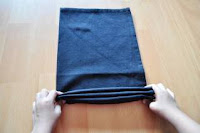
(a) Fold a large square napkin into quarters.
(b) With the loose edges at the bottom, start rolling the napkin from bottom up (this way your rolled-up napkin will not show the loose edges)
(c) Secure your rolled-up napkin with a ring.

Ring Roll #1
Ring Roll Folding #2
 Roll #3
Ring Roll Example #1

Roll Folding Example #2


2. Knot


(a) Fold a large napkin into half diagonally.
(b) Start rolling the napkin starting from the folded corners.
(c) Tie a knot at the center of the rolled-up napkin.


Knot Folding #1
Knot #2
Knot #3


3. Cone


(a) Fold a napkin into quarters.
(b) With the loose corners on top, bring down the first layer to almost half way down.
(c) Repeat with second layer leaving about 1 inch between the two points.
(d) Turn the napkin over. Fold in the sides.
(e) Turn in over once again. Slide in cutleries into the pocket if you wish or leave it as it is. You may also choose to leave a little 'something' on the napkin as deco. I like to leave a wine glass marker so that my guests can have a little bit of fun putting it on their own glasses). 


Cone Napkin Folding #1
Cone Folding #2
Cone #3
Cone Napkin #4

Cone Folding Example


4. Pocket


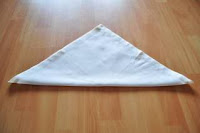
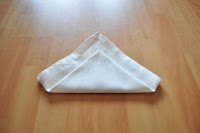
(a) Fold a napkin into quarters. 
(b) With the loose corners on top, fold down the top layer so that it meets the point at the bottom.
(c) Turn it over. With the two tips from earlier positioned at the bottom-right corner, fold in the left side first then the right . You may choose to secure the right folded side into the tiny "triangle pocket" you see on the left. 
(d) Turn it over and slide in your cutleries. 


Pocket Napkin Folding #1
Pocket #2
Pocket #3

Pocket Example


5. Surprise Package


(a) Fold a napkin into quarters.
(b) With the loose corners on top, fold the napkin from left to right (or right to left) into accordion pleats.  
(c) Slide a napkin ring to the center of the napkin and bunch it out at the top and bottom.


Surprise Package Napkin Folding #1
Surprise Folding #2

Surprise Example


6. Ascot


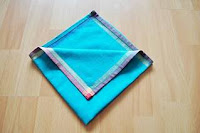
(a) Fold a napkin into quarters. Make sure that the points of the loose corners are aligned well, iron if you have to.
(b) With the loose corners at the bottom, fold down the top corner.
(c) Turn the napkin over. Fold in the left and right corner at an angle, i.e. the top edge of left and right side must be lower than the center. 
(d) Turn it over. If you are happy with the way it turns out, press down to crease the edges. This is a the perfect fold to show off your monogrammed napkins. 

Ascot Napkin Folding #1
Ascot Folding #2
Ascot #3

Ascot Example


7. Simple Bouquet


(a) Fold a large napkin as shown in picture. Make sure that the 4 'triangles' you see at the top are equal in size.
(b) Pinch the 'middle point' of the napkin and slide in a ring to the center of the napkin. 


Simple Bouquet Napkin Folding #1
Bouquet Folding #2
Bouquet #3

Bouquet Example


8. Fan-dango


(a) Fold a napkin into half.
(b) Make an accordion pleat along the narrow length of the napkin.
(c) Slide a napkin ring to the center of the napkin, or alternatively, you can tie a ribbon at the middle. Fan out the sides. 


Fan-dango Napkin Folding #1
Fan-dango Folding #2

Fan-dango Example


9. Fan


(a) Fold a napkin into half.
(b) Make an accordion pleat along the narrow length of the napkin.
(c) Instead of sliding a napkin ring to the center (or tying a ribbon here), leave the ring (or ribbon) at the edge of one side. 
Fan Napkin Folding #1
Fan Folding #2

There are various ways to display the fan fold. Here are some ideas.

Fan Example #1Fan Example #3Fan #4


10. Butterfly


(a) Fold a large napkin into half, diagonally.
(b) With the folded side at the bottom, fold in the right and left sides so the meet in the center. Make sure all the tips/points are aligned together.
(c) Fold the bottom point up to within an 1 - 1.5 inch of the top point. 
(d) Then fold the tip down so that it touches the lower edge of the napkin.
(e) Turn it over. Fold in the left and right side of the napkin. Secure one corner into the little triangle pocket of the other. 
(f) Turn it over again. Open the bottom side of the napkin so that it can stand up-right. 
(g) Pull down the left and right 'wings'.


Butterfly Napkin Folding #1
Butterfly Folding #2
Butterfly #3
Butterfly #4
Butterfly #5
Butterfly #6
Butterfly #7
Butterfly #8

Butterfly Example


That is all for now. I hope you've enjoyed the tutorial on napkin folding and that it has given some ideas for this festive season!
 

About me

Total Pageviews

Followers

Copyright © 2009-2011 Community is Designed by Bie Converted To Community Galleria by Cool Tricks N Tips

Privacy Policy|Napkin Rings