
- I've been getting requests on how to make these napkin rings. So I've decided to start with probably the simplest design - the spiral napkin ring. These are fun to make since we'll be using a lot of beads. And it is up to your own imagination and creativity in deciding which type, and sizes of beads, and color or combination of colors to be used. I am using plastic beads this time to show how even the least expensive of beads can be made into a pretty stunning napkin ring.

Materials you will need:


Step 1:


Step 5:
Beads, Thick Wire (about 1.2mm gauge), Headpins (x2)
Tools:
Round-nose pliers, Flat-nose pliers, Tube shaped object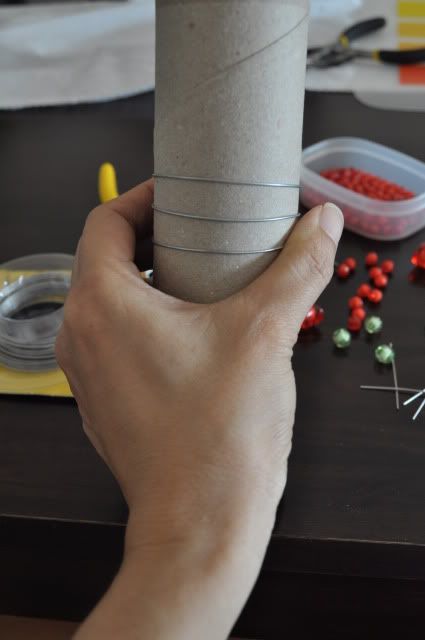
Step 1:
Wrap the thick wire around the tube several times to create a spiral. Remove the wire carefully without pulling it out of shape.
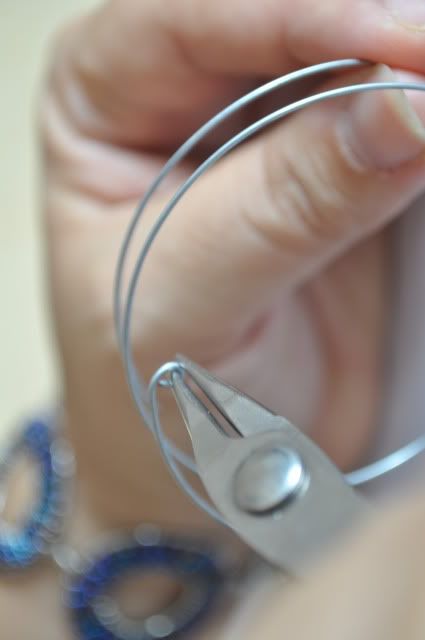
Step 2:
By using the round-nose pliers, bend one end of the wire into a small loop.
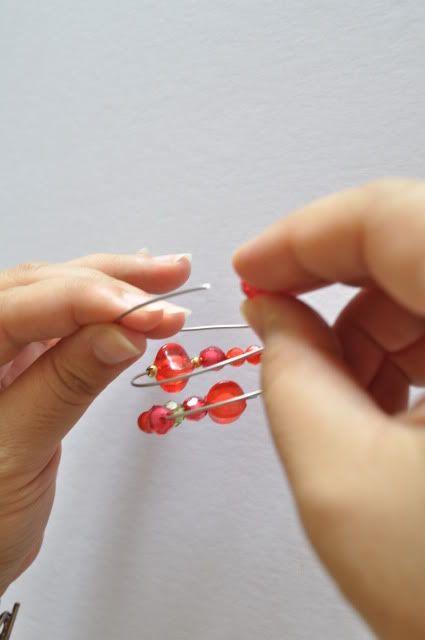
Step 3:
Insert or thread the beads on to the spiral wire.
Step 4:
Once all beads are threaded, make a similar loop at the end of the wire. 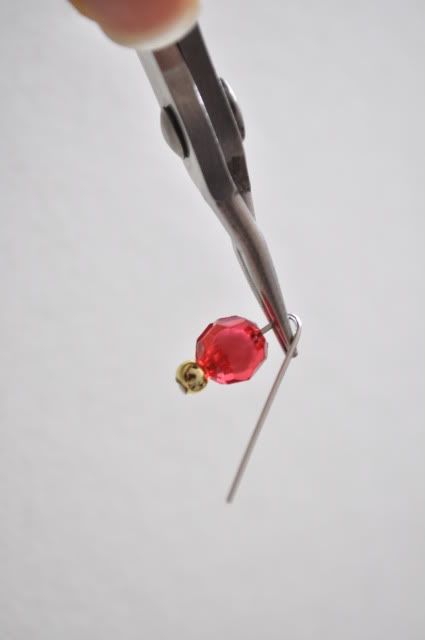
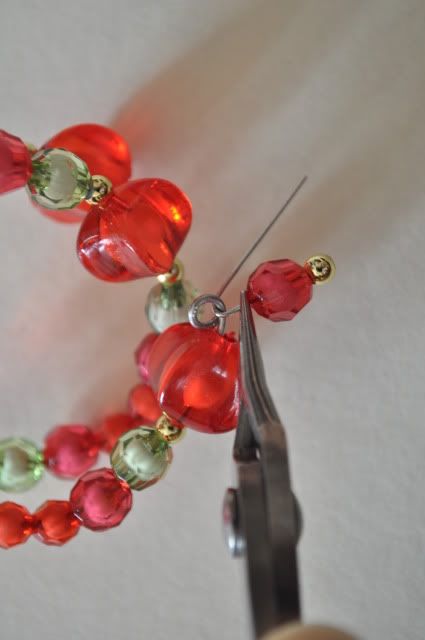
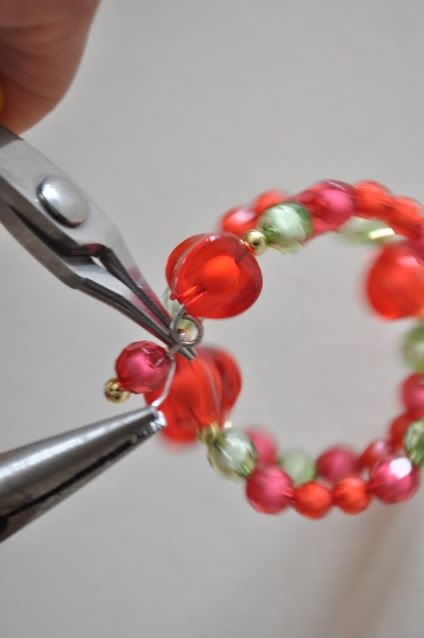
Step 5:
(This is a tricky step and can be skipped. If this step is skipped, then just use the flat nose pliers to pinch the end loops down so they stay somewhat hidden from view.)
Time to dangle some beads on the end loops. To do this:
a) Slide a bead onto a headpin and with a round-nose pliers firmly grasping the wire just above the bead (this is called the neck), bend the wire down to a sharp angle
b) Slide the headpin through one of the loops of the napkin ring
c) Use the round-nose pliers to grasp firmly at wire just above the bead and hold the tail wire with a flat-nose pliers and create create a loop by wrapping it around tip of the round-nose pliers then slowly wrap the wire around the neck of the headpin several times
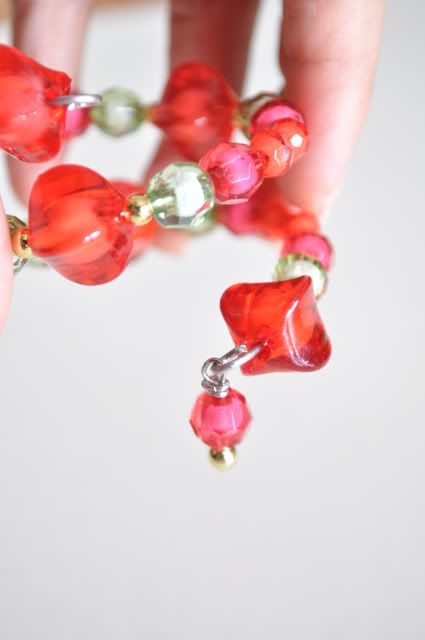
d) Cut the rest of the tail wire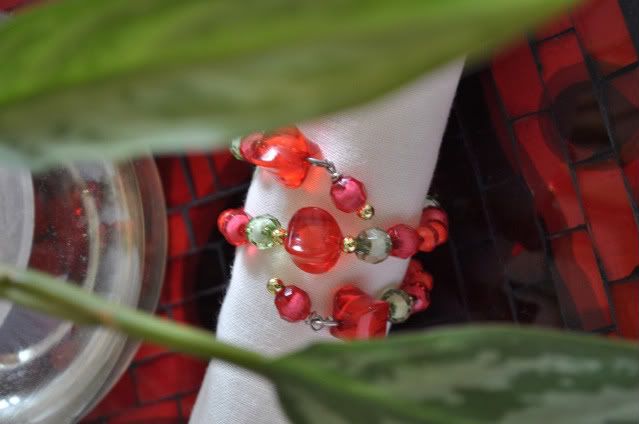 And voila! Your very own simple but yet elegant little napkin ring. I hope this tutorial has been useful to you. Please drop your comments, I would love to hear from you :)
Here's some pictures of my 3.5yo son making his napkin rings while I was preparing this tutorial. Yup, it's that easy to make :)


30 comments:
Thanks for sharing - your step by step explanations are easy to follow and I like the fact you don't need too many tools for this!
Great tutorial!
This is a great tutorial. I recently gave all my supplies and beads to my neighbor friend because the crafts I made were just awful. I think it takes a special eye AND hand to be able to create clean, pretty jewelry.
I am happy to see your blog? and your teaching. I'll tyr to make something like yours/ Thanks.
Thank you so much for your comments! Im glad that it's not as confusing as I thought it was lol. Maybe now I will start producing more tutorials. Really appreciate the input, thank you :)
You have an awesome and easy tutorials. How I love making something out of beads. Post more!!! Thanks
Shane Perez from Web design Kuwait
This is such a cute idea. We recently got a cute little bead shop by my home and I have been looking for great idea's to use my new beads with and this is perfect.
great blog! thanx a lot for this tutorial.
hi. thanks for sharing.
Great tutorial, I will bookmark this page. Thanks for sharing, how to make a beaded napkin ring. I am planning my wedding after 3 months, and I want to look exactly like this.
thanks for the tutorial, feels nice when someone shares such beautiful creations, however i will have to first see where i can get the tools and the beads, it will be a tough search given that i got no idea of such things previously...
Thank you all, and you're welcome. It was really a pleasure preparing this tutorial and I hope all of you have fun trying it out. Please drop me a msg should you have any question, or send me the pictures of your creations. I would love to see them! Good luck!
wow,you are so grate,I wanna try that,I will try that off duty.
This is a good blog, it is encouraging to see people giving value
through great post.Thanks
Wow really nice. I have to try this one. I will bookmark this one for reference. I will try to make one for my friend because her birthday is on Wednesday. Earlier i was thinking what gift will i give to her and then when i surf the net i found your blog. Thanks for sharing!
My wife is going to be helping out for a Wedding shower soon and I know she is going to need to make Napkin holders like these. Thanks for the tip and I will make sure and pass this along to her for assistance.
Thanks!
You got a really useful blog I have been here reading for about an hour. I am a newbie and your success is very much an inspiration for me...
Virtual Services
Thanks for the tutorial, I'll make these things tonight with my daughter for her tomorrow birthday party.
Thanks again!
Thanks, this is a very nice idea.
Very cute. It would also work well using small bracelet memory wire.
You have a very informative blog. Thank you. :)
Where can I find the beads used in this tutorial?
Why buy if you can make one? Great article!=)
best psychic
Thanks! I'm looking for neat craft ideas for my wedding and this tutorial gave me the idea to make this napkin ring that can double as a bracelet! Should be cool - Thanks again!
I'm trying to order beads online to make these- approximately how many beads do you think it takes to make 1 napkin ring?
Thanks for this good tips !
This is such a quick and easy tutorial for beginners! Love it! I will feature and link in a future post so others can come visit!!
Do you put the dangles at both ends?
What are the sizes of your beads? How many mm? How many beads fit a typical napkin ring?
This web site is really a walk-through for all of the info you wanted about this and didn't know who to ask. Glimpse here, and you'll definitely discover it.
Nice! Making it seems so easy and its pretty cool
And your son he's cute :)
Post a Comment